How To Start a Blog In 3 Easy Steps
See how to start your own blog in 3 easy steps!
Have you been thinking about starting a blog? Are you unsure how to get started? Blogging is a great way to express your thoughts, share your interests and even make money! Yes, you can make money blogging!
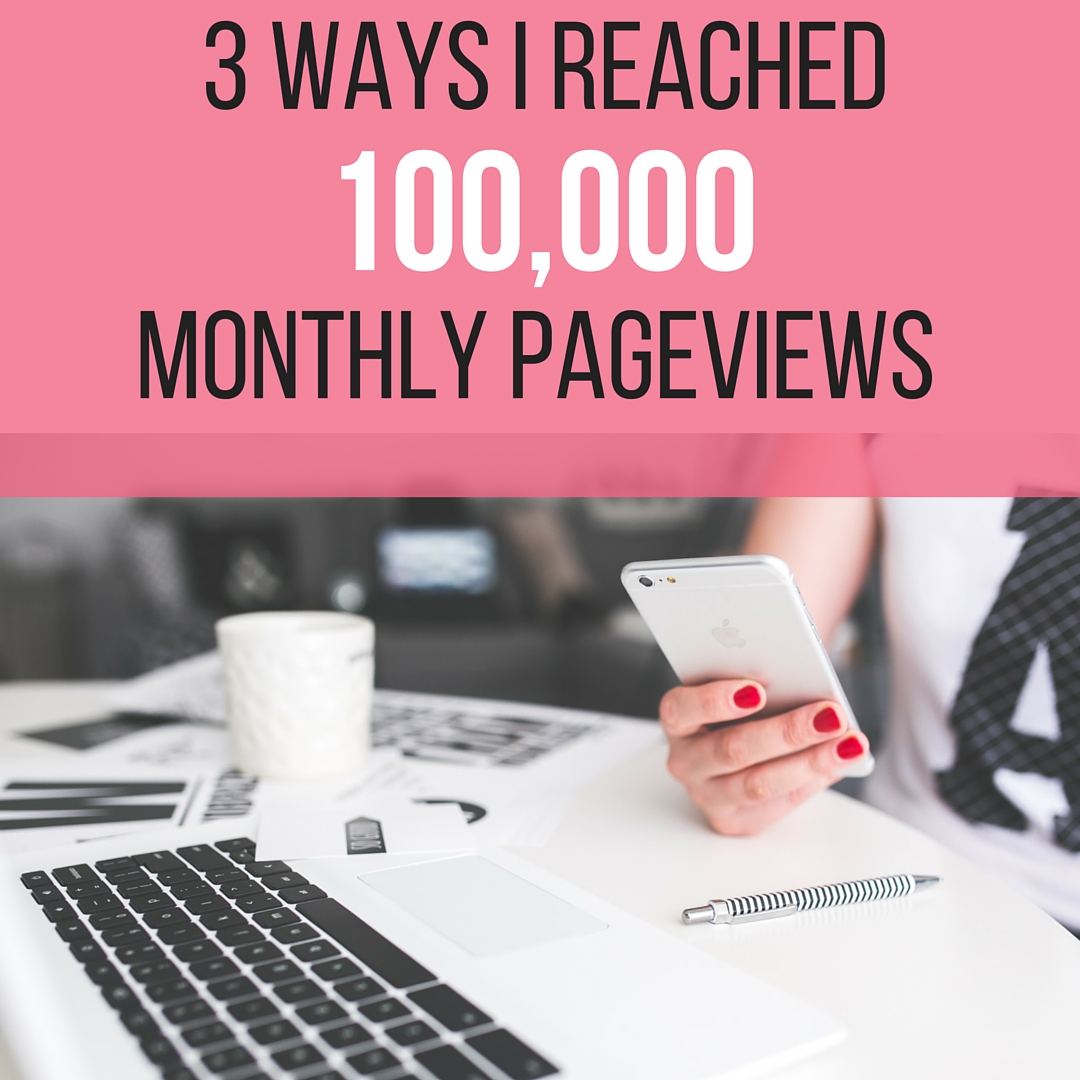
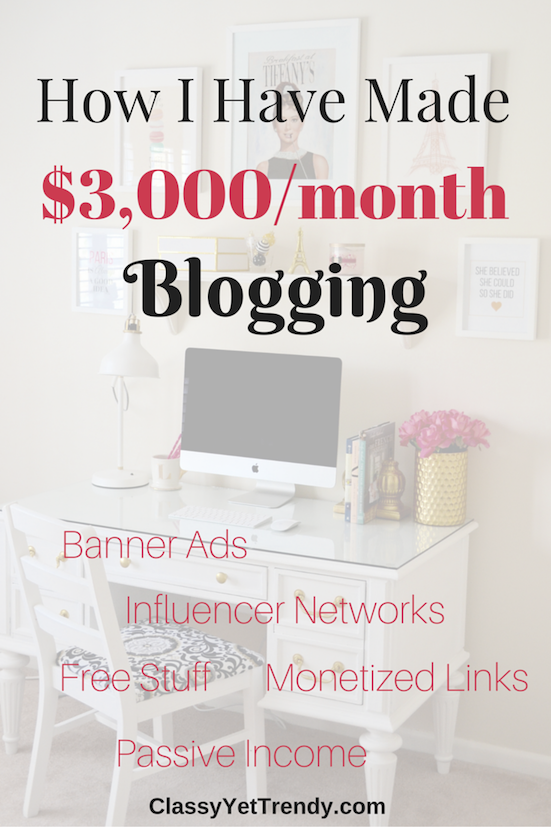
In 2014 I started blogging and I absolutely love it! I had always wanted to have a “website”, but wasn’t sure what kind of website. My love of fashion prompted me to start this fashion and style blog, Classy Yet Trendy. In just under a year, this blog reached 34,000 views in a month! Now, my blog brings in over 270,000 views a month! I monetize my blog by participating in several affiliate programs, I receive free products to feature on my blog and I sell e-books here too.
I’ve expanded my blog to include an online store where I sell my seasonal capsule wardrobe e-books. I not only monetize my blog, but I have turned my hobby into a small business as well! You can too!
Are you ready to start your own blog? Read on, to find out how!
I recommend starting your blog on the WordPress platform. You can start small, but if your blog grows, you can even turn it into a business and make some serious money!
You may be asking, What is a Blog Platform? It is the service that turns a regular website into a functioning blog. There two popular blog platforms: Blogger and WordPress. What is the difference? Blogger is owned by Google. It is free and since it is operated by Google, it is highly reliable. It worked well for me for over a year. Although, it is limited with its design capabilities. Also, if you want to use Google Analytics or add special features to your blog like Pinterest or affiliate programs, you have to manually enter code in your template.
I am now using WordPress, with self-hosting by BlueHost. Wordpress is easy to use and is user-friendly. There’s so much more you can do with WordPress. Unlike Blogger, if you want to add special features or code to your blog, you can easily add a “plugin”.
Which blogger platform do you pick?
If you are wanting to blog occasionally or just share your thoughts and interests, then Blogger would be fantastic. If you want to have a full-blown blog with lots of photos, the possibility of high traffic and really monetize your blog, then I recommend going with WordPress! What is Hosting for your Blog? Hosting is like renting space on the Web to display your blog. It’s where all your images and blog design reside. It takes only about 15 minutes to sign up for a blog. Are you ready? So, let’s get started!
There are three steps to having your own blog: 1) Choose a Domain Name and the Hosting, 2) Install WordPress and 3) Make it look great!
1. Choose a Domain Name and Hosting
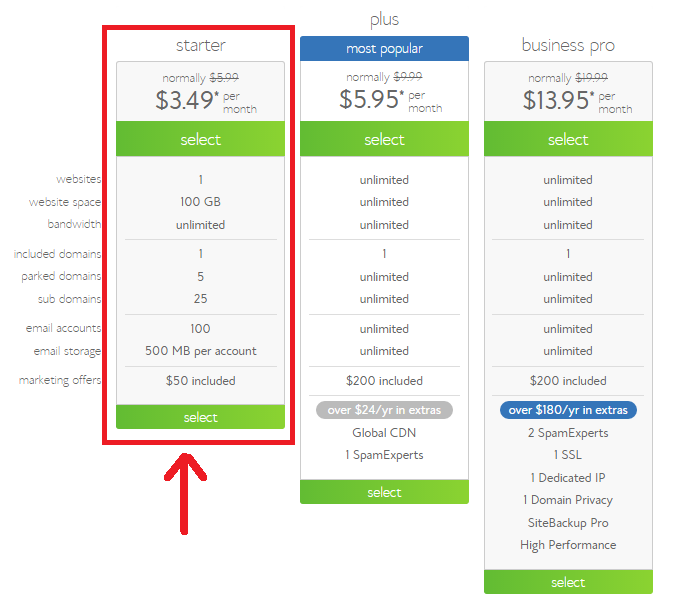
To have a professionally looking blog/site, you need a “.com” domain name. To decide on a name for your domain, you must first decide what your blog will be about. My blog, Classy Yet Trendy, is about fashion, beauty and lifestyle. So, my domain name is www.classyyettrendy.com. Ideally, you want your blog name and domain to be the same, so people can remember it easily. Think of several domain names, because, since the internet has been around for years, chances are a few will be already be taken. Keep your list handy, because we’ll use it in just a minute. Let’s go ahead and sign up for hosting at BlueHost. When I was deciding on where to have my blog hosted, I did lots of research on the internet for reliable hosts. I found that lots of bloggers who use WordPress also use BlueHost. BlueHost’s servers are able to keep up with lots of traffic, are reliable and are budget-friendly when it comes to paying for hosting. First go to BlueHost, then click on the “Get Started Now”. Next, you’ll choose the pricing plan. I recommend going with the “Starter” plan, because you can always upgrade later, if needed.
Follow these screen shots to set up your blog:
 Here’s where you will enter your first choice for your domain name. Enter it in the “New Domain” box. Don’t worry if your first choice taken, just go to your next favorite one on your list.
 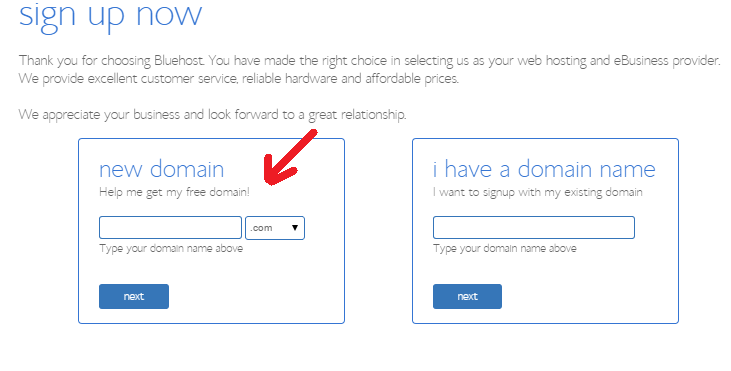 Next, you’ll choose your add-on’s if you want any of them.
 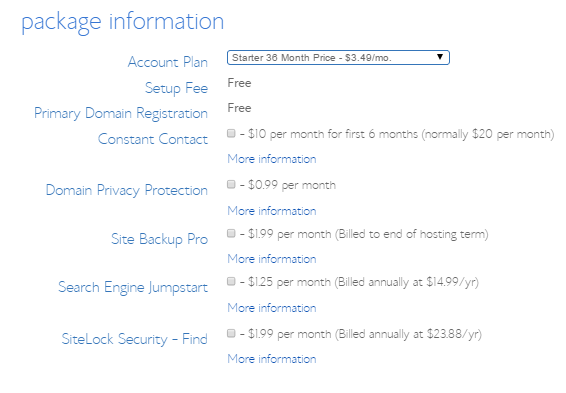 If you’re not sure if you will need any of these options, click on the “More information” underneath each one and it will explain. Lastly, enter your name, address and billing information. Voila, you have finished the Hosting signup.
2. Install WordPress
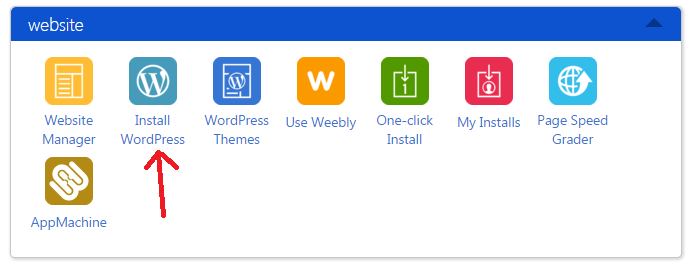
You will need to install WordPress on your BlueHost space. This will let you design your blog. Sign in to BlueHost. Go to the “website” section and look for the WordPress icon. Click on it.
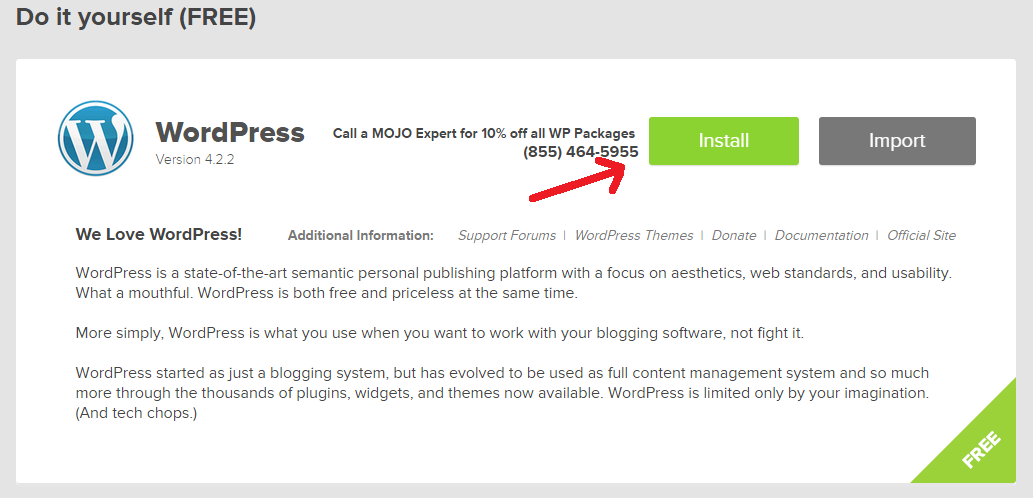
On the next page click the “Install” button in the “Do it yourself FREE” section.
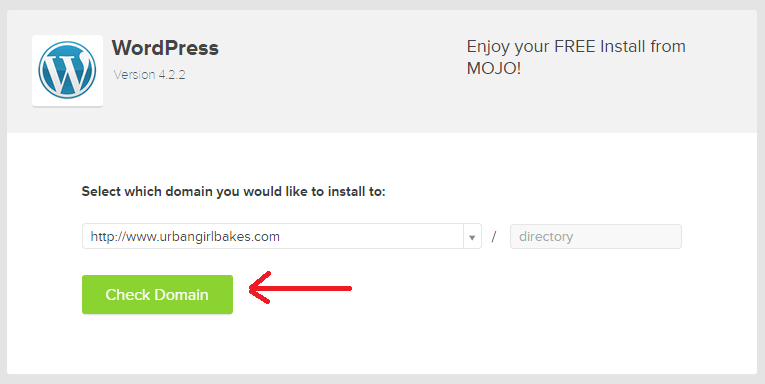
Make sure your domain is in the “http:” box and click the “Check Domain” button.
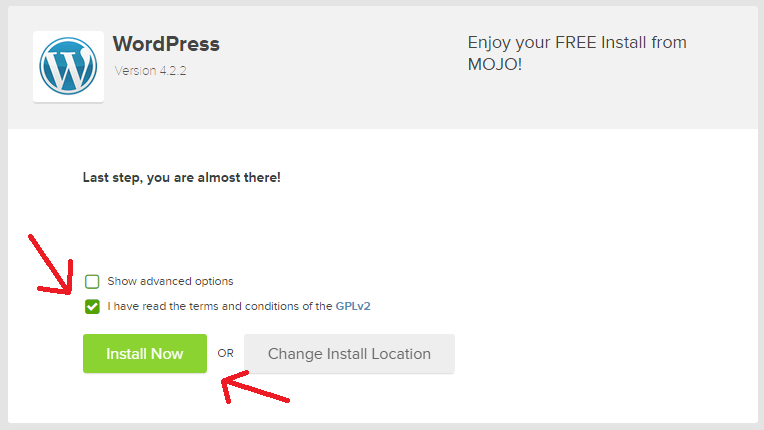
Check the terms and conditions box and then click the “Install Now” button.
Once you get the message that says “Your install is complete!” you’ll want to click on the “View Credentials” button and write down your Admin URL, Username, and Password. You’ll need these the first time you log in and start using WordPress.

Type your Admin URL (www.yourdomainname.com/wp-admin), where “yourdomainname” is what you established, into your web browser. You’ll see a login screen like the one below.
Enter your Username and Password (in the screen similar to the one below) you copied down from the previous step.

Now you’re ready to start creating your blog!
3. Make It Look Great!
Now that you officially have your own blog, you need to pick a theme to make it look great. What is a theme? It’s a predesigned template as to how your blog will look.
Here are some places to get a theme:
My #1 recommend theme seller is Restored 316. I am currently using their Tickled Pink Theme here on Classy Yet Trendy and I love it!
Another great theme I have on my food blog, UrbanGirlBakes.com is the Foodie Theme with the Genesis Framework. What is the Genesis Framework? It’s a framework that allows you to add widgets, customize your theme, ensures that updates are compatible with your theme, ensures your site loads quickly and is great for SEO (Search Engine Optimization). The Foodie Theme is the #1 selling theme for its clean design, easy customization and reliability. Check out the author’s site, Shay Bocks Foodie Theme, to find out more about this theme.
Read More: Top 20 Best WordPress Blog Themes
After you install your theme, you can upload your images and start blogging! There you have it!
BONUS: Add-on Features and Plugins
- Askimet: Filters out spam on your comments. Let’s you approve of comments before they are posted to your blog.
- Easy Recipe: This is a handy plugin for a food/cooking blog. It auto formats text into recipe layouts and is Google recipe search engine optimized.
- Jetpack for WordPress: Many useful features are included in this plugin.
- jQuery Pin It Button For Images: Adds floating Pinterest Pin It button when you hover over an image. Adds to more shares of your posts on Pinterest!
- W3 Total Cache: Speeds up your website and load times, so your readers can see your blog more quickly as well as increases your search engine rankings.
- WordPress Backup to Dropbox: Sets up a scheduled backup to download all the contents of your blog to your computer. A must for your blog!
- WordPress SEO by Yoast: Easy to use form fields to make sure your blog and posts are recognized best by search engines. Increases your blog exposure.
Add-ons for your blog:
- Feedburner: You can set up RSS feed as a way for your readers to subscribe to posts.
- Google Analytics: Track users, page views and overall statistics of your blog.
- Google Web Master Tools: Scan and view details of your site ensure your blog is properly setup.
- Mailchimp: Create a subscription box on your site to keep readers connected. Send out email campaigns for new posts as well as specific content.
- Pinterest Rich Pins Validation: Rich Pins allows your pins to list ingredients in that Pinterest’s preview page. People are much more likely to view and share your pins with this added information.
Good technical overview. I’m on Blogger, though. I find it simpler to use.
I just started blogging this summer and am thinking of switching to wordpress sometime soon. Thanks for the useful information. 🙂
http://www.chicuturnonglitz.blogspot.com
Have just started blogging since June and I find this post so informative and very detailed… Thanks for sharing! #brilliantblogposts
I was so glad when I made the switch to WP from Blogger. There is just so much you can do with it!
Thanks for sharing on the Shine Blog Hop!
Thank you for joining TBT Fashion link up and hope to see you next week.
Alice
http://www.happinessatmidlife.com
Great Tutorial! Thanks for sharing on My 2 Favorite Things on Thursday!! Hope to see you again this week!! Pinned!
Great overview. We use WordPress too:)